

What you get
Once connected, your agent can search your logs, look up issues, and run the same investigations you would run in a thread — from inside your editor or terminal. You ask in natural language (“what errors is checkout throwing in production?”) and the agent queries Sazabi and answers with evidence.Prerequisites
- A Sazabi account with at least one project that is receiving logs. If you have not sent logs yet, do the Quickstart first.
- A secret key, unless your MCP client signs in with OAuth (see The MCP path). Create one at Settings > Secret keys. Secret keys grant full read and write (organization-wide by default, or scoped to one project), so store it in a secrets manager and never commit it.
Choose a path
There are two ways to connect. Recommended for terminal agents: the CLI path. Install thesazabi CLI, and any terminal agent (Claude Code, Codex, OpenCode) can drive Sazabi through the same commands. Use the MCP path when your agent is a GUI client (Claude Desktop, ChatGPT) or you prefer wiring Sazabi in as an MCP server. It is the only path for GUI clients. Trade-offs: the CLI path is one identical procedure for every terminal agent; the MCP path is configured per client but works for clients that have no terminal. Do not use the CLI path for a GUI-only client that cannot run shell commands — use the MCP path there.
The CLI path
One procedure, identical for every terminal agent.Install and authenticate the sazabi CLI
-
Install the CLI globally:
To run it without installing, use
npx @sazabi/cli@latest <command>in place ofsazabi <command>. Keep@latest: without it,npxcan reuse an older cached copy that lacks newer commands and flags, such asstart --agent. -
Sign in. This opens your browser for a device-code sign-in:
-
Confirm you are authenticated and select your organization and project:
Run
sazabi organizations listandsazabi projects listif you need the IDs.
SAZABI_TOKEN environment variable to a secret key (or pass it with --token) and SAZABI_PROJECT_ID to your project’s ID instead of running sazabi auth sign-in. See Running without a browser.
Connect Claude Code or Codex subscriptions
If you use a Claude subscription with Claude Code, connect it from your terminal:--account-label to name the connection, --project <project-id> to select a project, or --reconnect <connection-id> to replace credentials on an existing connection.
Your terminal agent can now run sazabi commands — for example sazabi logs ask, sazabi issues list, or sazabi memory search — to investigate your project. Every command takes -h for its flags and examples.
The MCP path
For MCP clients, connect Sazabi as an MCP server athttps://mcp.sazabi.com/mcp. The server accepts two kinds of credential:
- OAuth sign-in. A client that supports MCP OAuth needs only the server URL. It opens your browser, you approve the connection, and the client acts as you. No key is created or pasted. The Claude Code, Cursor, and Codex CLI sections below show this path.
- A secret key. Every client can send a secret key in the
X-Sazabi-Secret-Keyheader. Use it for clients without OAuth support and for headless or shared setups where nobody can sign in through a browser.
- Sign in to Sazabi if you are not already signed in.
- On the Authorize MCP connection page, check the client name, then choose the organization the connection may act in.
- Under Project access, choose All projects or a single project.
- Select Authorize. The browser hands the sign-in back to your client.
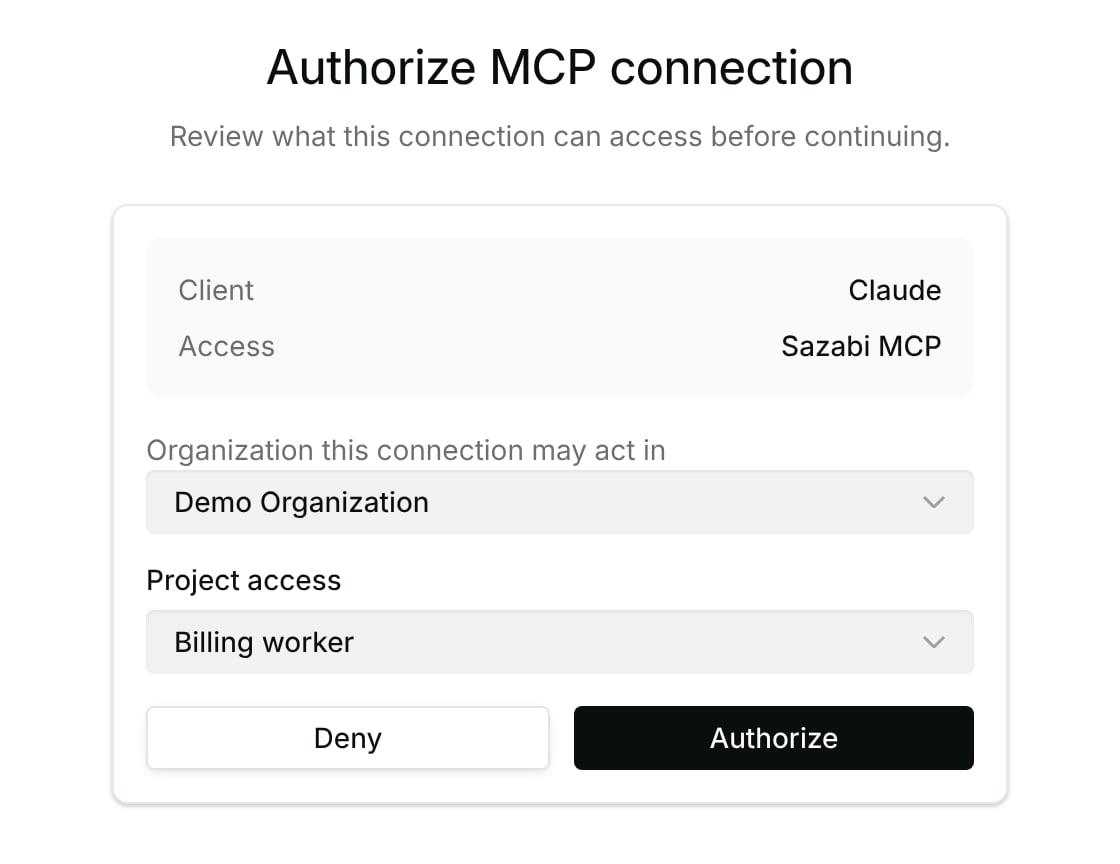
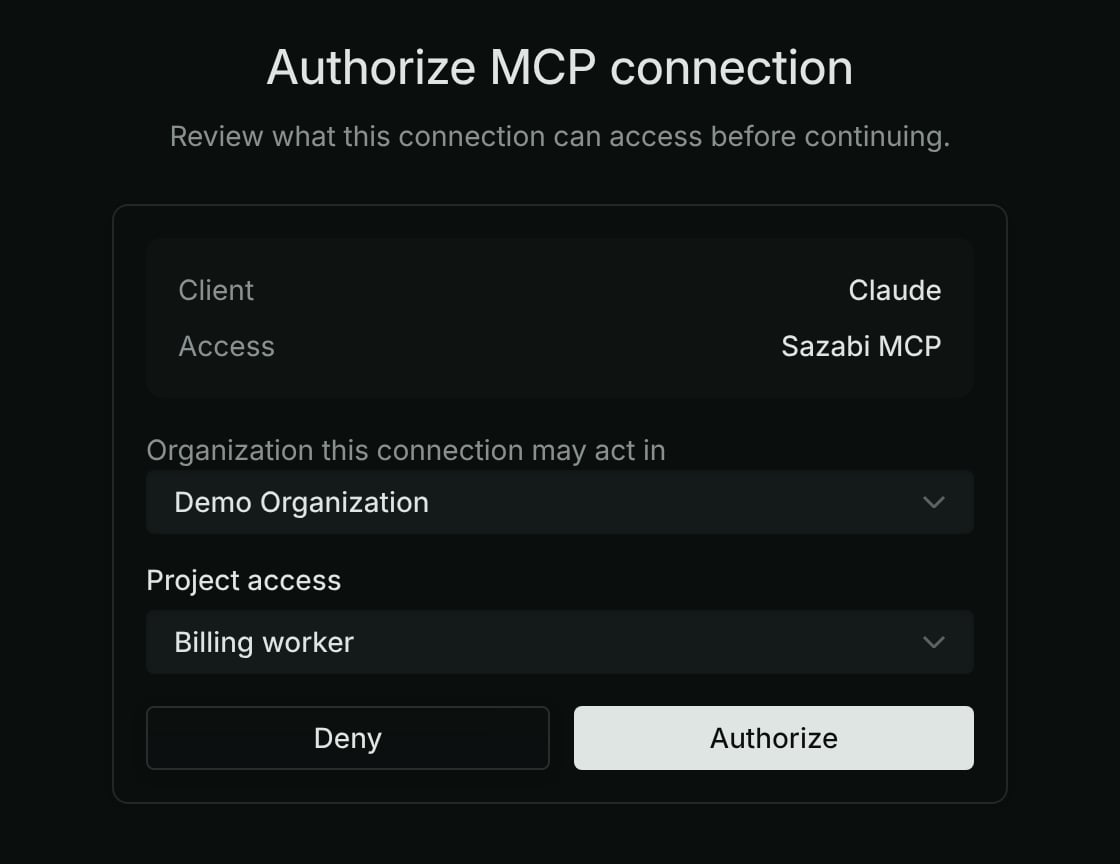
The Authorize MCP connection page.
<YOUR_SECRET_KEY>, replace it with a secret key from Settings > Secret keys, and keep that file out of version control.
Claude Code
Sign in with OAuth. Add the server from your terminal with no header:/mcp inside Claude Code, select sazabi, and complete the sign-in in your browser.
Use a secret key. Add the server with the key in a header instead:
Claude Desktop
In Claude Desktop, open Settings > Developer > Edit Config to openclaude_desktop_config.json (macOS: ~/Library/Application Support/Claude/claude_desktop_config.json; Windows: %APPDATA%\Claude\claude_desktop_config.json), then add:
Cursor
Cursor reads MCP servers from~/.cursor/mcp.json (global) or .cursor/mcp.json in a project. The same file serves both the Cursor editor and the Cursor CLI (cursor-agent).
Sign in with OAuth. Add the server with its URL and no headers:
mcp.json. If the server is in a project’s .cursor/mcp.json, the Cursor CLI asks you to approve it first: run cursor-agent mcp enable sazabi, then log in.
Use a secret key. Add the X-Sazabi-Secret-Key header instead:
X-Sazabi-Secret-Key header only if you are using a secret key.
Codex CLI
Add the server from your terminal:mcp and offline_access scopes. Do not add --oauth-resource; providing it again duplicates the discovered resource and causes authorization to fail with a 403 response. You can also edit ~/.codex/config.toml directly.
Codex Desktop
In Codex Desktop’s MCP settings, add an HTTP server with URLhttps://mcp.sazabi.com/mcp and the X-Sazabi-Secret-Key header set to your secret key.
OpenCode
Add the server from your terminal —opencode mcp add walks you through adding a remote server — or add it to your OpenCode configuration (opencode.json) directly:
ChatGPT
In ChatGPT’s connector settings, add a custom MCP server with URLhttps://mcp.sazabi.com/mcp and the X-Sazabi-Secret-Key header set to your secret key.
Try it: investigate production from your coding agent
With either path connected, ask your agent a question that requires your logs:Hand an issue to your coding agent
Every Sazabi issue has an agent prompt: one prompt you paste into your coding agent to continue Sazabi’s investigation, fix the problem in your repository, and open a pull request linked back to the issue. The prompt carries the issue ID and a link, never a credential. It tells the agent to install and sign in to the CLI if needed, read the analysis withsazabi issues get (its report field has the full what, why, how, and evidence), check the problem against live logs, and treat issue text and log lines as data, not instructions.
Print the prompt with the CLI and paste it into your agent (ISSUE_ID is the issue’s ID from sazabi issues list):
-
The
Sazabi-Issueline. In a GitHub repository connected to the issue’s project, a pull request whose body has the lineSazabi-Issue: <issue-id>is linked when it is opened or edited. -
An explicit link. Link any GitHub or Bitbucket pull request yourself:
source: "linked" and are never billed as pull requests Sazabi opened.
If a pull request is the suspected cause rather than the fix, label that relationship explicitly. You can find every issue attributed to the PR and remove a wrong attribution later:
Verify
Confirm the connection returns real data from your project.- First, send a distinctive test event if you have not already — see Quickstart curl step, using body
sazabi quickstart test event 8842. - Ask your agent:
Use Sazabi to find the log with body "sazabi quickstart test event 8842". - The agent returns one matching record with service
quickstartand severityINFO.
sazabi auth whoami shows the right organization and project.
Further reading
Agent tools
What the agent can search and do during an investigation.
MCP server reference
The search and execute tools, and authentication details.
CLI reference
Every sazabi command and flag.